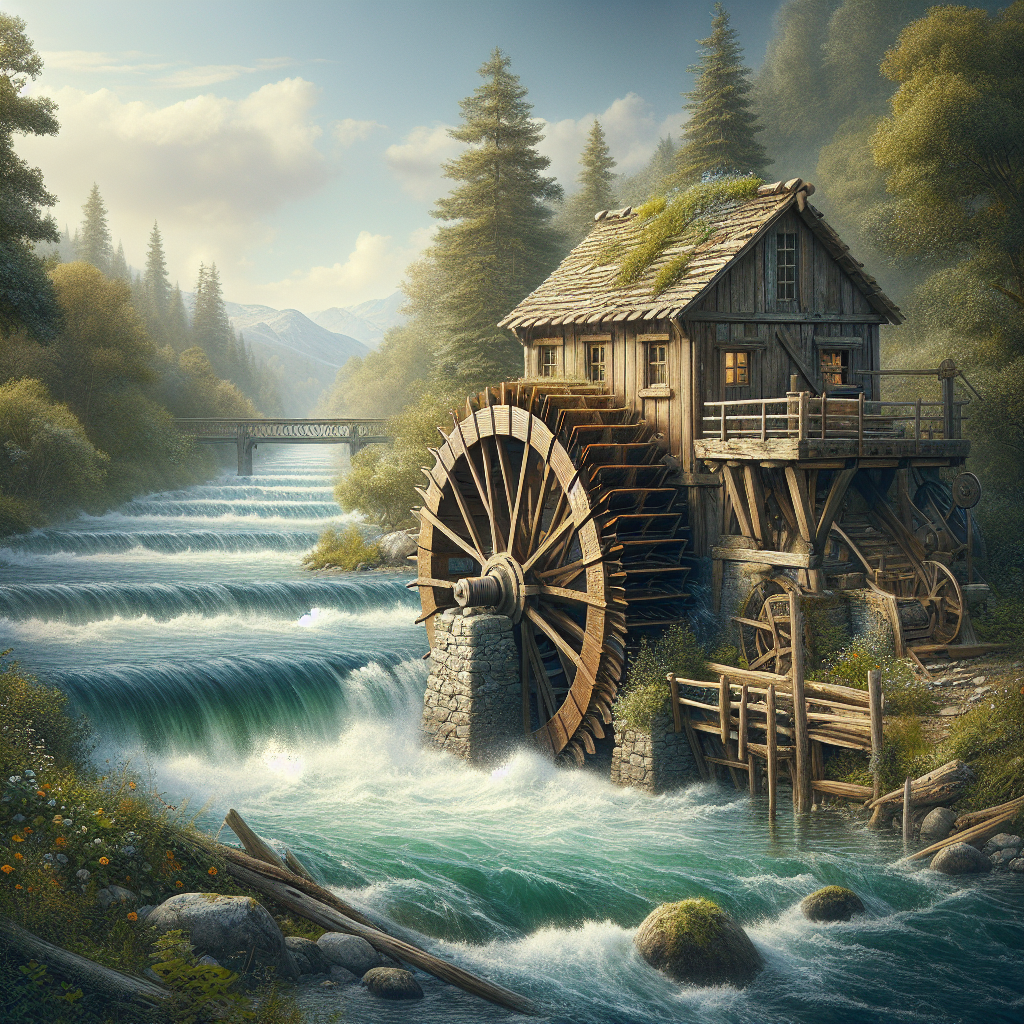
Are you looking for a simple yet effective way to harness energy? If so, look no further than a water wheel! In this article, you’ll discover step-by-step instructions on how to create your very own water wheel, which can generate clean and renewable energy. With just a few basic materials and a little bit of time, you’ll be well on your way to harnessing the power of water with your own DIY water wheel. So, grab your tools and get ready to embark on an exciting and energy-saving project!
Materials Needed
To make a simple water wheel for energy, you will need several materials:
Wooden plank
A wooden plank will serve as the base for your water wheel. Make sure the plank is thick and sturdy enough to support the weight of the wheel and the water flowing through it.
Wooden dowels
Wooden dowels will be used to create the spokes of the wheel. These should be strong and long enough to span the diameter of your wheel.
PVC pipe
PVC pipe will be used to create the buckets that catch the flowing water and generate rotational energy. Choose a size that suits your needs and is easily accessible.
Buckets
You will need buckets to attach to the wheel. These can be made of any durable material, such as plastic or metal. The size and shape of the buckets will affect the efficiency of your water wheel.
Nails
Nails will be used to secure the different components of the water wheel together. Make sure to choose nails that are long and strong enough to hold everything in place.
Hammer
A hammer will be needed to drive the nails into the wood and secure the different parts of the water wheel.
Saw
A saw will be used to cut the wooden plank and dowels to the desired size. Make sure you have a saw that can handle cutting through wood.
Drill
A drill will be necessary to create holes in the wooden plank and PVC pipe. Choose a drill bit that matches the size of the holes you need to make.
Wood glue
Wood glue will be used to strengthen the joints and connections of the water wheel. Make sure to choose a waterproof wood glue to withstand the water and moisture.
Waterproof sealant
A waterproof sealant will be applied to the wooden components of the water wheel to protect them from water damage and prolong their lifespan. Make sure to choose a sealant suitable for outdoor use.
Designing the Water Wheel
Selecting the size of the wheel
Before starting the construction of the water wheel, it is essential to determine the desired size. Consider the available space, the flow of the water source, and the amount of energy you want to generate. Larger wheels will generally produce more power, but they also require more materials and space.
Determining the number of buckets
The number of buckets on your water wheel will affect its efficiency in harnessing the energy from the flowing water. More buckets can catch more water, resulting in a higher power output. However, keep in mind that adding too many buckets can increase drag and reduce the wheel’s overall efficiency.
Finalizing the wheel design
Once you have decided on the size and the number of buckets, it’s time to finalize the design of your water wheel. Draw a detailed sketch or create a blueprint that includes all the measurements and specifications. This will serve as your guide during the construction process and ensure that everything fits together properly.
Calculating the desired RPM (Revolutions Per Minute)
The desired RPM of your water wheel will depend on the power requirements of the generator or motor you plan to connect to it. Calculate the RPM needed to achieve the desired power output and adjust the wheel’s size and bucket design accordingly. This will ensure that your water wheel operates at optimal speed and efficiency.

Preparing the Wooden Plank
Measuring and marking the dimensions
Start by measuring and marking the dimensions of your wooden plank according to your water wheel design. Use a measuring tape and a pencil to accurately mark the lengths and widths you need. Double-check your measurements to ensure accuracy.
Cutting the wooden plank
Using a saw, cut the wooden plank according to the marked dimensions. Take your time and make precise cuts to ensure that the pieces fit together neatly. Remember to wear safety goggles and follow proper safety precautions when using a saw.
Sanding and smoothing the edges
After cutting the wooden plank, use sandpaper or a sanding block to smooth out any rough edges or splinters. Sanding will not only make the wooden components safer to handle but also improve the overall aesthetic of your water wheel.
Adding support beams
To strengthen the wooden plank and provide additional support, consider adding support beams. These can be attached underneath the plank, running perpendicular to the direction of the water flow. Use wood glue and nails to securely fasten the support beams to the plank.
Constructing the Water Wheel Frame
Cutting and assembling the wooden dowels
Measure and cut your wooden dowels to the desired length for the spokes of your water wheel. The length will depend on the size of your wheel and the spacing you want between the buckets. Once cut, assemble the dowels in a radial pattern, ensuring they are evenly spaced.
Attaching the dowels to the wooden plank
Using wood glue and nails, attach the assembled dowels to the wooden plank. Make sure the dowels are centered and secure. You may consider reinforcing the connection by drilling pilot holes through the dowels and into the plank before inserting the nails.
Creating an axle for the wheel
To allow the water wheel to rotate freely, create an axle that will pass through the center of the wheel. For small-scale water wheels, a sturdy wooden dowel can serve as the axle. Make sure the axle is long enough to extend beyond the spokes on both ends.
Securing the axle in place
To secure the axle in place, drill holes in the support beams underneath the wooden plank and insert the ends of the axle. You may add wood glue or use nails to further reinforce the connection. Ensure that the axle rotates freely without any binding or restrictions.

Building the Buckets
Choosing the bucket size
Consider the amount of water flow and the desired power output when choosing the size of the buckets. Larger buckets can hold more water, resulting in more energy generation. However, keep in mind that larger buckets may also increase the weight and drag on the water wheel.
Cutting out bucket shapes from PVC pipe
Measure and mark the desired size and shape of the buckets on the PVC pipe. Use a saw or a pipe cutter to cut out the bucket shapes. Take your time and make clean, precise cuts, as this will affect the performance and overall efficiency of your water wheel.
Drilling holes in the bottom of each bucket
To allow the water to flow out of the buckets, drill holes in the bottom of each bucket. The size and number of holes will depend on the desired water flow and the amount of energy you want to generate. Ensure that the holes are evenly spaced and not too close to the bucket’s edges to maintain structural integrity.
Attaching the buckets to the wheel
Using nails or screws, attach the buckets to the wooden dowels on the water wheel. Make sure the buckets are evenly spaced and securely fastened. Take into account the direction of the water flow to ensure that the buckets catch the water effectively.
Mounting the Water Wheel
Selecting a location near a water source
Choose a suitable location for your water wheel near a natural water source, such as a river or stream. Ensure that the water flow is constant and sufficient for your power requirements. Consider any legal or environmental regulations that may apply to the construction of your water wheel.
Building a sturdy platform or frame
Construct a sturdy platform or frame to support the water wheel. This can be made of wood, metal, or any other material that provides a stable foundation. Make sure the platform or frame is level and securely anchored to the ground to prevent any movement or instability.
Positioning the water wheel on the frame
Carefully position the water wheel on the platform or frame, ensuring that the axle aligns with the water source. Check that the wheel spins freely and does not rub against any other components or structures. Make any necessary adjustments to ensure proper alignment.
Securing it properly for stability
To ensure stability, securely fasten the water wheel to the platform or frame. You may use brackets, straps, or other suitable fasteners to hold the wheel in place. Ensure that all connections are tight and secure to prevent any wobbling or movement during operation.
Creating a Conveyor Belt
Installing two parallel wooden beams
Install two parallel wooden beams on the opposite side of the water wheel. These beams will serve as the tracks for your conveyor belt or chain. Make sure the beams are level and securely attached to the frame or platform.
Attaching a belt or chain to the wheel
Attach a belt or chain to the water wheel by wrapping it tightly around the outer edge of the wheel. Make sure the belt or chain is securely fastened and does not slip or come off during operation. Use suitable connectors or fasteners to secure the ends of the belt or chain together.
Connecting the belt to a generator or motor
Connect the other end of the belt or chain to a generator or motor. This will allow the rotational energy of the water wheel to be converted into electrical energy. Ensure that the connection between the belt or chain and the generator or motor is secure and properly aligned.
Adjusting tension and alignment
Once the belt or chain is connected, adjust the tension and alignment to ensure smooth operation. The belt or chain should be tight enough to prevent slipping but not too tight that it puts excessive strain on the water wheel or the generator. Check for any misalignments or rubbing and make any necessary adjustments.
Testing and Troubleshooting
Checking for smooth rotation of the wheel
Before fully relying on your water wheel for energy generation, test it to ensure smooth rotation. Make sure the wheel spins freely and without any obstructions or drag. Pay attention to any unusual noises or vibrations that may indicate an issue that needs to be addressed.
Evaluating water flow and bucket fill rate
Observe the water flow and the rate at which the buckets fill up. Ideally, the buckets should fill evenly and consistently. Adjust the flow rate by making changes to the water source or modifying the bucket design if necessary.
Testing the power output of the generator
Connect a load or device to the generator or motor and test the power output. Monitor the voltage, current, and overall performance of the generator to ensure that it meets your energy requirements. Adjust the water flow or wheel design if the power output is lower than expected.
Addressing any issues or inefficiencies
If you encounter any issues or inefficiencies during testing, take the time to troubleshoot and identify the underlying causes. This could include adjusting the wheel design, optimizing the bucket size, or modifying the water flow. Regularly monitor and evaluate the performance of your water wheel to ensure it operates at peak efficiency.
Maintenance and Upkeep
Inspecting for wear and tear
Regularly inspect your water wheel for any signs of wear and tear. Check for cracks, loose components, or any damage that may affect its performance. Address any issues immediately to prevent further damage or malfunction.
Replacing damaged buckets or parts
If any buckets or components of the water wheel become damaged or worn out, replace them as soon as possible. Damaged buckets may affect the overall efficiency of the wheel and reduce its power output. Always keep spare buckets and other replacement parts on hand for quick and easy replacements.
Regular cleaning to prevent debris buildup
Clean your water wheel regularly to prevent the buildup of debris, sediment, or algae. Remove any obstructions that may hinder the rotation or water flow. Consider installing a screen or filter system to minimize debris accumulation and ensure the longevity of your water wheel.
Lubricating moving components
Apply lubricant to the moving components of your water wheel to reduce friction and prevent premature wear. This includes the axle, bearings, and any other rotating or sliding parts. Always use a lubricant suitable for outdoor use and follow the manufacturer’s instructions.
Expanding the System
Scaling up the water wheel size
If you find that your current water wheel is not generating enough power to meet your needs, consider scaling up the size of the wheel. This may require additional materials and adjustments to your existing setup, but it can significantly increase the power output of your water wheel.
Adding multiple water wheels in series
To further increase the power generation capacity of your system, you can add multiple water wheels in series. This means connecting them in sequence so that the water flows from one wheel to the next, generating rotational energy as it passes through each wheel. This cascading effect can greatly multiply your power output.
Integrating a battery storage system
To ensure a constant and reliable power supply, consider integrating a battery storage system into your water wheel setup. This will allow you to store excess energy generated by the water wheel for later use, especially during periods of low water flow or high energy demand.
Considering alternative energy sources
While a water wheel is an effective and reliable source of energy, it may not be ideal for all locations or circumstances. Consider exploring other renewable energy sources, such as solar, wind, or geothermal power, to complement or supplement your water wheel system. This will provide additional flexibility and resilience to your energy generation setup.
By following these steps and considerations, you can successfully build a simple water wheel for energy. Remember to prioritize safety and environmental responsibility throughout the construction and operation of your water wheel. Enjoy harnessing the power of flowing water to generate clean and renewable energy for your needs.